It's Cyber Monday so I'm giving you extra incentive to check out my Etsy shop. This coupon code expires a week before Christmas...so hurry over to my Etsy shop to order gifts for people on your list. Just enter "CHRISTMAS12" at check out to receive 15% off your total purchase!
P.S.--Links to my Etsy shop can be found on the top tabs or the slideshow on the right hand side. :)
Monday, November 26, 2012
Saturday, November 17, 2012
New Etsy Item: Baby Snuggle Wrap
I'm getting behind in my blogging as the holidays approach, and life is getting busier. Anyways, here is a new product preview for my Etsy shop. I'm excited to introduce baby snuggle wraps!


I made the one shown for a baby shower at church. Of course I found the printable pattern linked from here on Pinterest! I chose to make the one pictured above with coordinating cotton flannel, but will have a custom option in my Etsy shop. Then customers can choose from the fabric choices I have on Flickr.
I'll be listing these in the next day or so. Please let everyone having a baby or looking for a great baby shower gift to buy one of these from my shop.
Saturday, November 3, 2012
Pinterest Project: DIY Cake Stand
There are so many ideas on Pinterest on how to make a DIY cake/cupcake stand with items from Dollar Tree. So I decided to try it! The downside is that I didn't read any directions before doing the project, and i learned that I should have.
Off to Dollar Tree I went since I always have a list of things to get there, and I found a plate that I liked. Then I was trying to find a wine glass that fit with it, but didn't have any luck. Then a kind lady, who has done the project before, suggested a candle stick. So with those items in hand I headed to Hobby Lobby to get the glue that the kind lady suggested (E-6000).
 When I got home I glued to candle stick to the plate, and put it in the garage to dry (since it was starting to smell up the house).
 A few days later I spray painted the bottom side of the plate and candle stick.
 I wasn't planning spraying the top of the plate, but in my eagerness to get the project done I didn't realize there would be a clear circle where the candle stick was glued to the plate.
 So I spray painted the top of the plate as well.
Regardless of my minor mistake it was a fun, quick, and cheap project. The plate and candle stick were $1 each, E-6000 glue was $5, and the pink spray paint I already had. I already have the supplies to make another one, but this time I'll spray paint before gluing together!
NOTE: Sorry, for the sideways pictures! For some reason when I put them in Blogger they turned sideways :(
Off to Dollar Tree I went since I always have a list of things to get there, and I found a plate that I liked. Then I was trying to find a wine glass that fit with it, but didn't have any luck. Then a kind lady, who has done the project before, suggested a candle stick. So with those items in hand I headed to Hobby Lobby to get the glue that the kind lady suggested (E-6000).
Regardless of my minor mistake it was a fun, quick, and cheap project. The plate and candle stick were $1 each, E-6000 glue was $5, and the pink spray paint I already had. I already have the supplies to make another one, but this time I'll spray paint before gluing together!
NOTE: Sorry, for the sideways pictures! For some reason when I put them in Blogger they turned sideways :(

Sunday, October 28, 2012
Another test post
Sorry, this is another test post from my phone. I'm trying out a different blog app.
Sunday, October 14, 2012
Apple Butter
Life has been busy so I'm a little behind on my blogging. Sorry for that! I wrote this post a few weeks ago, but never got around to editing & posting it.
After having an apple butter smoothie while visiting the Cashmere Cider Mill this summer I had the grand idea to make apple butter myself. This was my first adventure into canning by myself.


After having an apple butter smoothie while visiting the Cashmere Cider Mill this summer I had the grand idea to make apple butter myself. This was my first adventure into canning by myself.

Delicious apple butter smoothie!
So where do you think I looked first for a recipe? On Pinterest of course! I found this recipe that I liked. I decided to use the stove top method even if it meant setting aside a whole Saturday to do so. Although a lot of the recipes on Pinterest were for crock pot apple butter (maybe next time!).
It happened to work out that we got a lot of apples from my great aunt. So I peeled, cored, and diced the apples. I threw them all into the Dutch oven pot on the stove and let them cook down. Once they were mushy I took my immersion blender and made it look like nice smooth applesauce. I decided to use agave nectar instead of sugar as a sweetener; then I added cinnamon, nutmeg, and ground clove. Next step was to set it to medium-low and let it cook down, but don't forget to stir every 20 minutes. As it cooked down the house started to smell delightful! The whole cooking down process took about 5 hours. While the apple butter was cooking down I went on the hunt for some small jars and lids in the garage, and washed them. By the end of the process I filled four jars, sealed them, labeled them, and they're stored in the garage for later use.

All canned and ready to eat another day!
I tend to be a homebody, so spending a whole day at home stirring the apple butter every so often while working on a sewing project (which is my next blog post!), knitting, and reading wasn't a huge hassle to me. In fact I'm hoping to make some pumpkin butter as well since pumpkins are on sale.
Saturday, September 15, 2012
Paper Plate Apple Craft
This year I'm in charge of crafts for my pre-k class since I'm creative. The other day we made these paper plate apples, and they turned out so cute!

Of course I found the idea on Pinterest which linked me to here. I chose to simplify it a bit.
All you need is:
Large paper plates
Red tempera paint
Green and brown construction paper
While the kids painted their plate, I cut out leaf shapes from the green paper and stems from the brown paper. After the paint was dry I glued the leaf and stem to the back of the plate. Voila! There you have a cute and simple fall craft for kids.
posted from Bloggeroid
Sunday, September 9, 2012
You're Dyeing to Know...
...what I dyed aren't you? Sorry, but I couldn't resist the horrible pun. I finally got around to dyeing the Ikea blanket I bought a few months ago. Ikea only sells the blankets in white, tan, grey, & red. I loved the texture of the blanket, but didn't like any of those colors. Then I had the bright idea to buy the white one, and dye it to match my duvet cover on my bed. So with a white blanket in hand I headed to JoAnn's to pick what color I wanted. Note: read the tag on the item you are dyeing BEFORE buying the dye! I made the mistake of thinking it was cotton, when it was really a poly blend, and had to go back to exchange the dye for natural fabrics for the iDye Poly (pictured below). Also, sorry for poor picture quality; these were taken with my iPod before I found my camera again (YAY!). Anyways, continuing with the fabric dyeing process...


The blanket before.

I decided green would go nicely with my duvet cover. I read all directions before starting.

The water in the washer after putting in the dye packet.

Scariest part: putting in the blanket & not being 100% sure of how it will look afterwards.

Completely in the murky green water...time to close the washer and wait.

It's green! This is after the first rinse. It recommends a second rinse to lock in the color.

A beautiful day to line dry a blanket. The tag on the blanket said no machine drying.

The after...a pretty green blanket!
I'm glad I got around to dyeing this blanket because I use it all the time now. It's light yet cozy, and the texture is so fun! Now that I've dyed something I'm not so scared to do this again. Hmm...what could be next? What have you dyed? What would you like to dye?
P.S.--I watched "Julie and Julia" last night. That movie always inspires me to blog more regularly. I've got a few projects waiting to be blogged about. So I'm going to try to keep it up! I'd love to have new followers, too. Maybe I'll do a give away or something if I can get up to 30 followers by the end of the year. Please let others know about me if you like reading my blog. Thanks!
Testing
I'm testing out how blogging from my Droid phone works. If this works I'll be able to post more often. :)
posted from Bloggeroid
Tuesday, September 4, 2012
Wedding Invitations (all the details!)
Now that Diana's wedding is 19 DAYS away I figured I better post about the invites I made. Finally (in June), Diana's wedding invitations are complete and mailed out. I have gotten permission from the bride to give you all the details on making the invitations as I promised you here.
This was my wedding gift to Diana and Aaron. Since I like making cards I figured I would give them something that will make their special day that much more special. Diana even told me when they were all completed, "They're beautiful, and exactly what I wanted. Thank you so much for making them for us." Also, part of my gift are the place cards, table names, & programs. We will be finishing those up this weekend, and I'll post about those after the wedding (bride won't let me before).
We got an idea of what Diana wanted from looking on Pinterest and Split Coast Stampers. Then we took those ideas to my Stampin' Up! demonstrator, Julie, who's always got ideas. After a few trials we thought we had something great, but then the groom had an opinion too. So we made a few changes to make everyone happy. In the end we went with half white emboss, and half clear emboss. I used the Baroque Motifs stamp set with the black and red paper. I used white card stock from FedEx Office for the inside papers. For the embossing I wiped it with my embossing buddy, stamped in Versa Mark ink, and then sprinkled with embossing powder before using my heat tool (which can melt carpet I discovered...just FYI!).The belly bands are simply stamped in Versa Mark ink with the swirl pattern before cutting them into strips.
I think that's all the details I can remember. So go ahead and look at the pictures now. I do need to say a BIG thank you to Diana for helping with her own wedding gift! I wouldn't have been able to complete these 44 cards by myself without going insane without her. I love ya bestie!!
 |
| Here are all 44 finished invitations! We ended up with 24 white embossed, and 20 clear embossed. |
 |
| This is the inside with the pocket to hold the RSVP & direction cards. |
 |
| Outside of a clear embossed card. |
 |
| Front of a white embossed card with the red belly band. Picture-wise I like these better than the clear now, but both turned out gorgeous. |
 |
| Front of a clear embossed card with the red belly band. I notice now that the clear ones don't look as elegant in a picture as they do in person. |
Wednesday, August 1, 2012
First Visit to Home Goods!
We finally have a Home Goods store!! After reading about this store on the Young House Love blog all the time I was excited to finally check it out in person. About a month or so ago the one in Lynnwood opened across from Alderwood mall, and I had been dreaming of my first visit ever since! I finally went with my Mom on Monday.

I did find a few things to buy for the upcoming bridal shower & bachelorette parties I'm co-hosting for Diana. Gotta love the clearance shelves through out the store!


I went with the thought that I would just window shop so here are some pics that I would love to buy someday (sorry, I still can't find my camera so these were taken using my iPod):

Love the bright colors of this bench!

Even at $130 it's still a bit pricey, but I have ideas running through my head to sew liners for the drawers so I can use it for yarn storage.

A purple pan...I want this for my kitchen SOO bad!

I love that this ottoman has storage inside.

A pretty lamp that I'm not sure where I would put it.

This painting just makes me wish I could be sitting in one of those chairs drinking a margarita.

I saw these cute note cards while waiting in line to check out...gave me an idea for a DIY gift!
I have determined that I LOVE Home Goods, and need to go back soon! It's like Cost Plus World Market meets Target which are two of my favorite stores so that's a major score on my part. :)
Tuesday, June 26, 2012
Margarita Cupcakes
Since we were having taco salad for my Grandma's birthday lunch we decided to stick with a Mexican theme for dessert. I found these margarita cupcakes on Pinterest. I used this Margarita cupcake recipe , but since I didn't have a box mix I make the cake mix from scratch. So this is the DIY white cake mix recipe I used, but in my opinion it needs a little tweaking because the cake itself was heavy instead of fluffy like a cupcake should be. The lime buttercream frosting was simple to make and delicious to boot! I added a few drops of green and yellow food coloring to give it a lime hue. I topped all of the frosted cupcakes off with a sprinkle of kosher salt which not only kept the true margarita flavor, but also was a nice touch of saltiness to accent the sweetness of the frosting and cake. Finally, what would a baking post be without a few pictures?!

This is the first dozen I frosted. You can kind of see the light green hue in the frosting. Disclaimer: I am certainly not a professional. Although, I'd love to take a cake decorating class at a bakery or craft store someday.

Here are the second dozen...the frosting job turned out a little better on these ones.
So there you have my latest baking adventure. Stay tuned in the next week or so for my detailed report on the wedding invitations. :)
Sunday, June 24, 2012
June Garden Update
It's been since May & April when I last posted about my garden. Everything has grown a lot since then. Check out these pictures to see for yourself:


Big picture view of raised bed, raspberries, small bed, blueberries.

Close up of the two new blueberry bushes I planted. Finally dug up the lemon balm, and added a few friends for my lonely blueberry bush.

Raised bed: 2 tomatoes, 3 bush beans, 2 corn, & chives. In front is carrots, swiss chard, & kale. I'll post about making kale chips later. :) Look at that raspberry patch! I picked the first 4 berries off it today, & they were SO yummy!!

Big picture of the left side of the garden. Look how tall those peas are...taller than my 5'1" that's for sure!
A better view not looking through the peas. It's hard to see, but in the middle is mystery squash (note the 4 garden labels). After the wind blew over my green house these are the squash that came up, & we'll see what they produce. This also gives a good picture of the soaker hoses I finally got out of the shed.

Here's a better view of the spinach, & leaf lettuce that were in the shade of the last picture. They look a little thin because I picked some for salad. :) Might I add that it was delicious salad!

This is the "small" garden off to the side of the raspberry patch. Sadly my radishes have all bolted. :( On the other hand that one cabbage is doing great!

The flower bed by the house is looking a lot better since the April post. Mostly due to the fact that I've been working on weeding it. My dahlias are coming up! The fenced in plant has decided to grow super tall this year. :/ Like the peas it's taller than my 5'1", and continues to grow!
Thanks for taking a peek at my growing garden! Sorry that the pictures are not the best quality since I took them with my iPod touch (I have seemed to misplace my regular camera).
Saturday, June 16, 2012
Versatile Blogger Award
Looking at my blog traffic sources the other day I found a blog address among the usual Pinterest and Google searches. So I clicked on it and it took me here.
Turns out she was nominated for the Versatile Blogger Award, and listed my blog as one that she nominates for the award. Thank you Stitchknit for the nomination!! Up until now I never knew there were awards for blogs. Like her I can knit & crochet better than doing things on my laptop so bear with me if not all the links work properly since I just learned how to use the link feature. There are a few rules that go along with being nominated:
Turns out she was nominated for the Versatile Blogger Award, and listed my blog as one that she nominates for the award. Thank you Stitchknit for the nomination!! Up until now I never knew there were awards for blogs. Like her I can knit & crochet better than doing things on my laptop so bear with me if not all the links work properly since I just learned how to use the link feature. There are a few rules that go along with being nominated:
- Thank the person that nominated you...check
- Link back to their blog...check
- Tell that person 7 things about yourself
- List 15 blogs you follow & nominate for the award
- Living in Seattle, Starbucks coffee is a necessary part of life. I'm a proud Gold card holder! My favorites are the Salted Caramel Mocha in the fall/winter, and either the Mocha Cookie Crumble Frappuccino or the Green Tea Frappuccino in the spring/summer.
- As I've written about on my blog, I love to garden! I find that pulling weeds is a great way to decompress after I get home from work.
- I love creating! Anything really it doesn't matter if it's knitting, crochet, sewing, card making, scrapbooking, or making sample crafts for my pre-k class.
- I like to travel, but wish I had more time and money to do so (who doesn't?). My favorite trip so far was to Hana, HI on Maui.
- Also previously seen on my blog, I have two adorable rabbits. Although I admit Teacup is in the spotlight more often since she's only a year old, and is very curious. Pumpkin is older, blind, and is content to snuggle (which I don't mind).
- I love to cook and bake! Experimenting in the kitchen is one of my favorite things to do. I admit that not all of my adventures have turned out like I thought (for example the chocolate peanut butter pillows I found on Pinterest), and I admit sometime there are tears. It doesn't stop me though.
- Lastly, I'm addicted to Pinterest! I know I've mentioned it here before, but it's true and I'm not ashamed to say it.
- Decorating with Lola!
- Moore Babies
- Thrifty Decor Chick
- Skinnytaste
- Longing for Home
- Julie's Stamping Station
- Happy Dog Buttons
- The Dainty Daisy
- The Purl Bee
- Never Not Knitting
- Speckled Owl Studio
- Make It and Love It
- On the Refrigerator Door
- House of Smith's
- A Friend to Knit With
Saturday, June 2, 2012
A Sneek Peek
Last night for girls' night Diana and I finished her wedding invitations! FINALLY!! Well, technically they're not 100% complete yet since I still need to cut a few more belly bands, score them, and glue them. The big thing is that all of the embossing is done, and now I know that embossing 44 cards is not an easy task. Also, all the printing for inside cards is done, and Diana enjoyed cutting those apart and putting them in the pockets. :) Since the invites haven't been sent yet I'm not allowed to post all the details until the end of June, but I was allowed to take a preview picture to show my embossing accomplishment.
 This is after I edited it a little in Instagram. I love, love, love that swirl pattern stamp! I can't wait to share all the details with you later this month.

Friday, May 11, 2012
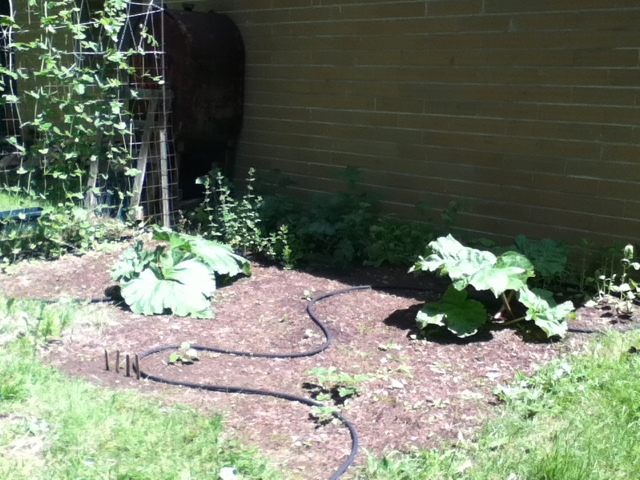
Delicious Rhubarb (and a garden update)
This post is slightly past due since it was actually two weeks ago, but it's still worth writing about. It's rhubarb for goodness sake, and who doesn't like a good rhubarb pie? I know I certainly will choose rhubarb pie over cake any day!
Any ways, two weeks ago I went back to water the garden and everything had seemed to sort of explode growing-wise (weeds included to my displeasure). The best part is that both rhubarb plants were ready to harvest for the first time this spring!

Here are my freshly picked and cut rhubarb stalks. :) Eight isn't so bad for the first harvest! And what do we make with rhubarb...

...a rhubarb crisp of course!! Since rhubarb is quite tart I like to add extra sugar to sweeten it up a little. Also, since rhubarb is watery when cooked down I stick it under the broiler at the end of cooking time to crisp up the topping. :) I'll try to take pics while I'm making it next time for a post about rhubarb crisp.
Since I haven't posted much lately I also have a general garden update for you.


These are the gorgeous daffodils that come up year after year in the front corner flower bed.
So that's it for my brief garden update. Hopefully I'll post soon about whatever gardening and/or crafting I do this weekend with the wonderful warm weather we're supposed to get here in Seattle.
Subscribe to:
Posts (Atom)