Monday, April 23, 2012

She's a Digger!

After leaving Teacup in the grass for a few hours she decides it's a good idea to DIG! She started with little holes, but her last one will need extra dirt to fill in.

My hand in the hole so give an idea of how big it is. As you can see it's about half way to my elbow!

She looks so innocent, but she's not! Look at all that dirt she's dug up & "bulldozed" away. I must say that she's very cute as a little bulldozer. :)

As Teacup's mom I think this is the cutest picture with her butt sticking out while she's digging. Shows how deep it is if she fits half way inside!

Update: this hole was started last weekend so we tried an experiment. We moved the fence so the old hole was in the middle (since she it started on the side) wondering if she'd keep digging the old one or start a new one. Guess what she did? Both! I had tried to fill in the old hole a little & she dug it out again. She also started a new hole next to the fence. What a little stinker! Funny thing is that Pumpkin was out this afternoon, and I noticed she was trying to put dirt back in both of the holes!

In other news, since it was Earth Day that means I've been a semi-vegetarian (no red meat including beef, pork, etc. but still eat poultry & seafood) for 2 years now. Funny how it's gone by so quickly.

Monday, April 16, 2012

Garden--April Edition


I've been talking about my garden lately so I figured I should dedicate a post to it. These pictures are as far as I've gotten so far.


This is a wide shot of the whole back garden. You can see the red rain barrel on the left, and the homemade compost bin on the right (behind the grassy mound).

Left side of the garden contains (front to back & left to right): snap peas, lavender (behind the pallets in this pic), oregano, mint, rhubarb, potatoes (these came back from last years that I thought I dug up all of), lettuce, spinach, more rhubarb, and strawberries. The leaf pile on the right is what I use as mulch in the winter to cut down on weeds; it hasn't made it's way to the yard waste bin yet. Update: I'm excited that a few stalks of rhubarb are ready to pick! Mmm...rhubarb crisp :)

In front of the raised bed is garlic in the black pots, lemon balm (digging this up this year since it spreads like a weed), carnation, and blueberry (this poor little bush is getting a partner after reading that you NEED 2 in order to produce fruit). The raised bed currently has chives and asparagus. To the right is raspberries, and in the pot are strawberries. The dirt strip on the left has kale, swiss chard, and carrots.  You can see the raised bed needs A LOT of weeding before starts go in later. Also, I'm working on getting a fence to tie in the raspberries or else they fall over when fruit gets too heavy; the plan is to have the raspberries go along the raised bed and about a foot wide. We got quite a bit of fruit last year just from the small patch you see here.

This is the small patch of garden in front of the grassy mound that was originally dug out for corn, but works well for other things like acorn squash, too. Right now I have cabbage on the right, and radishes on the left. Update: I have to admit this picture is a few days old, and as of yesterday the radishes have started to sprout! This makes me happy because I planted extra radishes to eat the sprouts, like bean sprouts you buy at the store, in salads and on sandwiches. :)


This is my backyard flower garden next to my rabbit cages. It hasn't been weeded yet, but needs it badly as you can tell. Besides dandelions I have vinca (the purple flowers that makes pretty ground cover), lavender, an iris, and assorted dahlias (my favorite!). I'm not sure what it's called that the fencing is around, but if it gets too tall it falls on top of my dahlias so I fence it in to prevent that.


So there you have it...my garden. I'll take more pics to update y'all once things start growing, starts get planted, weeding is done, etc. I hope this year's garden does better than last year. :/

Thursday, April 12, 2012

Trials & Errors of Making Yogurt

My mom and I recently found a gem of an old fashioned yogurt maker at Goodwill a month ago for $6! I was excited to try it, but how? Thank goodness for the internet with a wealth of recipes to choose from, but how do I know which one will work best? So I picked a few after Googling "Salton Yogurt Maker", and gave it a try. Sadly, my first attempt did NOT work. :(  The containers overflowed, it was too runny, tasted horrible, and there was more.

So my next move was to ask on Facebook. Thanks to Nan for giving me the same recipe she used with the exact same yogurt maker! I changed how much milk so the containers don't overflow. Here it is for anyone else that finds a similar yogurt maker at a thrift store or yard sale:

Preheat the yogurt maker. This may seem minor, but making yogurt is sensitive to drastic changes in temperature.

I like to set out the 2 Tablespoons of plain yogurt for the starter so it can come to room temperature while I heat & cool the milk.

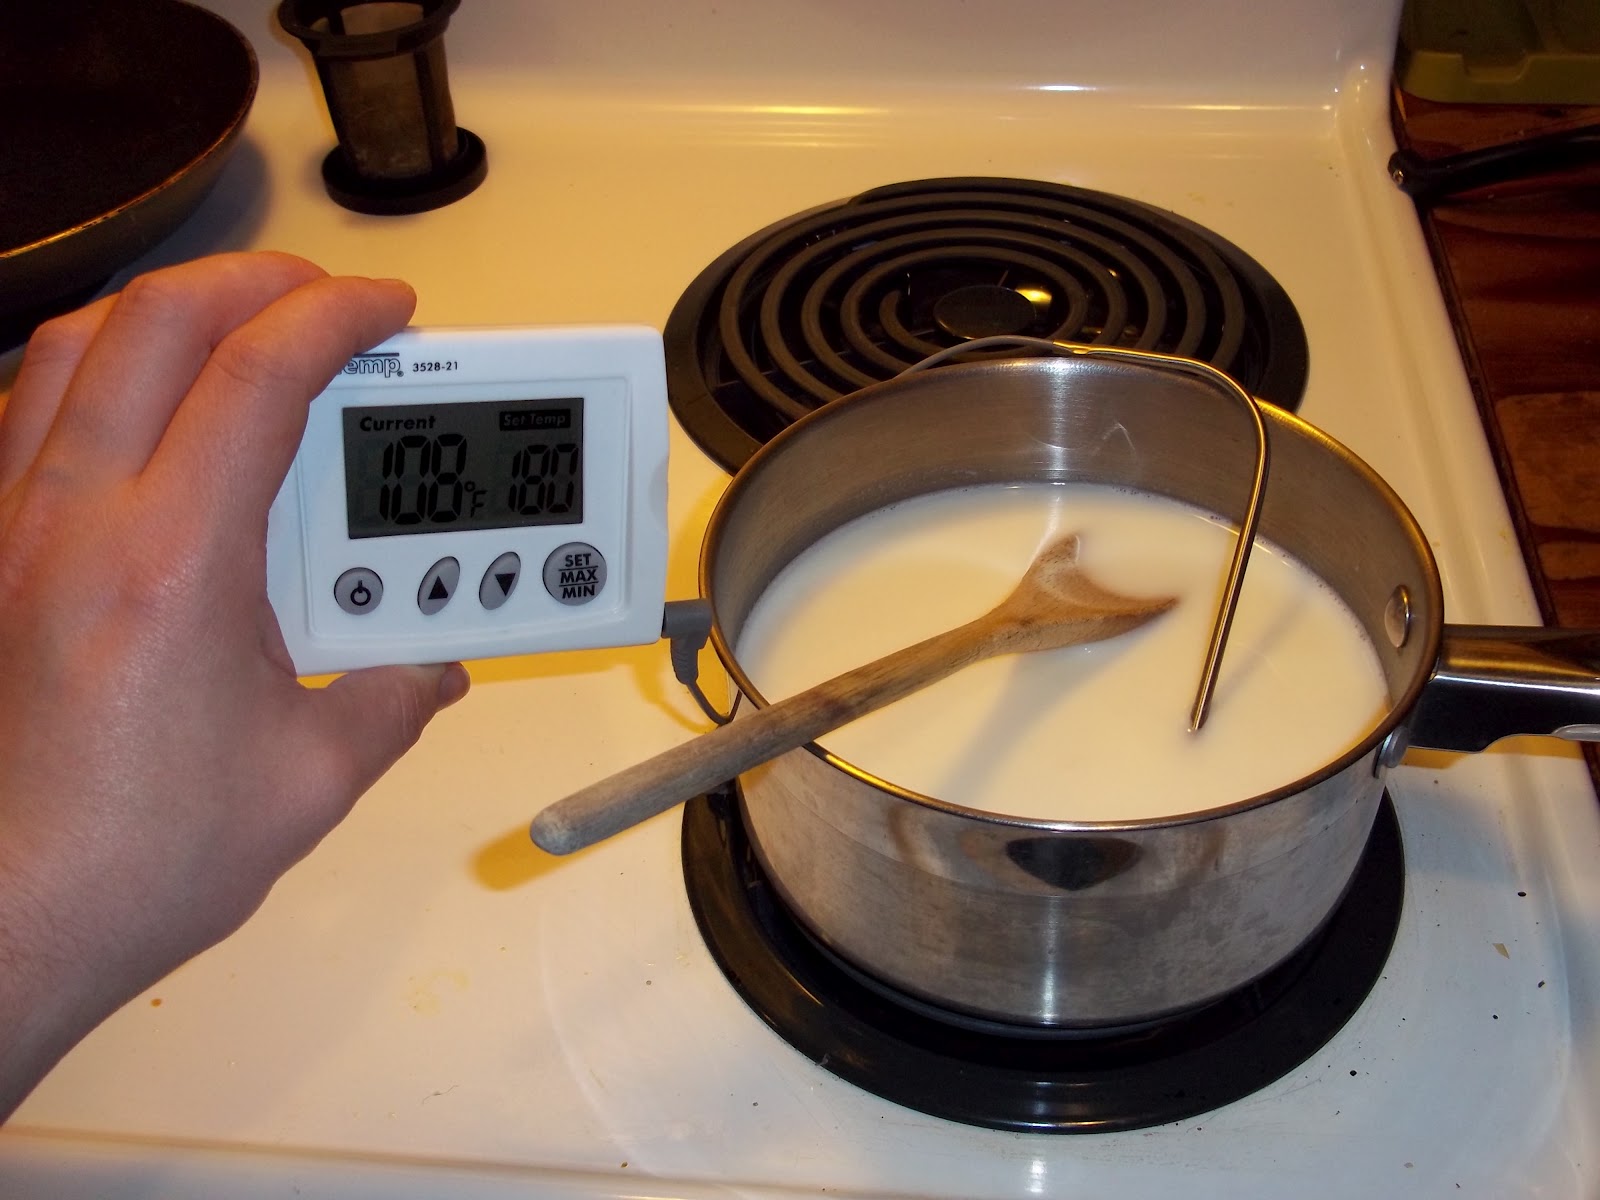
Heat 3 cups of milk (I like 2% or 1% best) to 180 degrees F on medium-high in a heavy sauce pan. I like to use a probe thermometer that can be set to the temp to I know exactly when it reaches the right temp. Remove from the stove immediately.

Cool to 120 degrees F. I like to stir to make it go faster, but you can just let it set off the stove. Stirring goes faster, and the whole heat then cool process usually takes me about an hour.

Once the milk reaches 120 degrees F mix 2 Tablespoons to the yogurt, and then stir into the rest of the milk.

Pour into the containers (as evenly as possible). Cover and let sit for 8-12 hours. Put the containers in the fridge, and it keeps for up to a week.

Yogurt in a Salton Maker
from Kathleen Oordt; A Rainy Day Designs blog

Ingredients:
3 cups milk; whole, 2%, or 1% work best
2 Tbls PLAIN yogurt; regular or Greek work

Plug in maker to pre-heat. Put 2 Tbls of yogurt in a bowl. Heat milk on med-high to 180 degrees F; stirring to prevent scorching. Cool to 120 degrees F; stirring to prevent hot or cold spots. When it reaches 120 degrees F stir 2 Tbls of milk into 2 Tbls of yogurt then stir into the rest of milk. Pour evenly into containers, covers, and let sit for 8-12 hours. Refrigerate for up to a week.


Sunday, April 8, 2012

Happy Easter!

This is Teacup. She's 9 months, and my little baby. (Although she's pretty much full grown & not as fluffy as she used to be.) Isn't she just adorable?!

"Christ the Lord is risen today, Alleluia!" This is one of my favorite holidays because it reminds us of Jesus' sacrifice for us. I was never raised on Easter being about bunnies, candy, egg hunts, etc. My parents always taught me the true meaning of Easter, and for that I am grateful. Singing the "Hallelujah Chorus" in church this morning really gives you a rush (and maybe a sore throat if you're a soprano like me) of thankfulness for God's love & mercy.

On another note, I planted things in my garden today! The weather was a perfect spring day in Seattle so I took advantage. I planted cabbage starts I got for free along with radish, snap pea, carrots, kale, and swiss chard seeds. I was hoping to get lettuce mix and spinach seeds planted as well, but I ran out of daylight. The rhubarb, chives, lemon balm, raspberries, and strawberries are growing nicely. I can't wait for that first rhubarb crisp or pie! Hopefully the rain holds off for a few more days so I can finish planting lettuce and spinach, and also plant some seeds in starts to put in my greenhouse. I take pictures along the way for y'all to see. :)

Here she is sniffing/nibbling on my pants. Just too cute!

Saturday, April 7, 2012

Hosting a Bridal Shower (marshmallow cupcakes)

I have three weddings to go to this year. Which is exciting because I LOVE weddings! First, is my cousin and his college girlfriend in Logan, UT in May. Second, is my friends Becky and Kevin from Bible study in July. And the one you've all read about already, my best friend Diana (who I'm the maid of honor for) in September.


So, this post a little late but I'll share it anyways. Since Becky is in my church, but her family is scattered around the world (Very literally! Her parents in Japan, sister in China, & brother in Holland.) a few ladies and the high school youth group girls decided to get together to throw her a bridal shower while her mom was in town at the beginning of March. We tried to keep it as a sort of surprise, but her mom ruined it by telling her (oh well). So four of us got together to plan it on President's day. We decided to all make 1 dozen cupcakes with marshmallow flowers. Feeling inspired by pictures like this: http://www.thecupcakeblog.com/tag/marshmallow-flower-cupcakes/. What seemed like an easy process of decorating took me 4 hours the Saturday before! They did turn out pretty cute though.


Finished marshmallow flower cupcakes. :) I used mini marshmallows and regular. I had to do some research on the best way to cut the regular ones (lengthwise instead of diagonal like the mini ones). Also, my scissors kept getting gunked up, but with a little spray of canola oil they were as good as new. I used yellow M&M's for the center, but others used yellow Skittles or gumdrops. The cupcakes were just a box mix, but you could easily make them from scratch if you wanted. There were 6 or 7 dozen total cupcakes at the shower!

As for the rest of the shower, we kind of a potluck-style food table. We asked several people to provide items for punch, veggie tray, fruit tray, and crackers with cheese. It was in the evening so we just had snacks. We played one game, but it was hilarious! We had three groups and they each made a toilet paper dress on the three special guests (Becky, her mom, and her fiance's mom). There was a contest of the best looking dress, and also the dress which stayed on the best while walking down a runway to model them. All of the "dresses" stayed on very well so each model got a prize (a potted primrose). After that the bride-to-be opened the gifts while I wrote them down, and Ruth made the ribbon & bow bouquet for the rehearsal.

Overall it was a great event, and everyone enjoyed themselves. The most important thing is that Becky felt very loved from her church community. Now I'm working on planning Diana's shower with her mom & sister!


Sunday, April 1, 2012

Details, Details

So, I've switched to the new format for blogger with hopes that it will help solve a few issues I've had with blogger (posting pictures was a hassle). Now I can give you more details on how I made my melted crayon monogram art. Yay!


I decided on a 1" border so I marked that out with pencil, and started hot gluing the crayons on the canvas.

All done hot gluing! I used 30 (I think) crayons on a 12"x12" canvas.

I layered strips of blue painters tape vertically & made another layer horizontally for the monogram. I found a font I liked in Word, and printed out the size I thought fit well. Then cut around it with an Exact-o knife. Getting the tape 'K' off the cutting mat was the hardest part of this project!

Ready to melt! I used my embossing gun instead of a hair dryer. The embossing gun put out hot air, but has less force so the crayon doesn't splatter as much (it splattered a little as you can see in the picture below).

Finished melting; now letting it dry/cool. I had a mini panic attack when I peeled off the tape, and saw it had bled through the edges.

Not to worry though, a little tracing with a black sharpie (that no longer works due to waxiness on the tip...oops!) solved my problem. Notice the splatters of red & orange on either side? I think it adds character! My personal favorite is the added shimmer from the glitter crayons, but I love anything sparkly. :)

Here's the finished product hanging up in my room. Yeah, I know it's not centered. I happened to have a nail there from a larger picture that got taken down.


Overall this was a cheap, easy, and quick project. The only cost was the canvas which was $6 at Big Lots since I already had the crayons, hot glue & glue gun, Exact-o knife, and embossing gun. It only took me an hour tops. Cutting out the monogram, and gluing the crayons took the longest. So now you know the details of my second Pinterest craft project.